-
Products
-
Solution

Improving power quality and optimizing control
-
Service

-
About us

-
Responsibility

-
News

-
Join us

-
Contact us
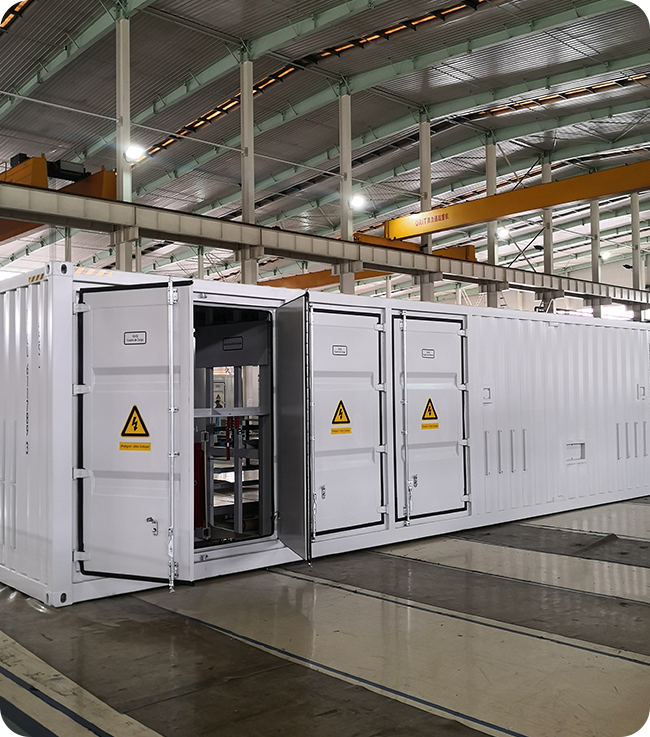
Improving power quality and optimizing control

RXPE suggests that SVC equipment should be systematically repaired and maintained once a year, and the primary and secondary equipment, control and protection system and water cooling system of the whole system should be comprehensively inspected and maintained, and the maintenance and repair report should be issued. If individual parts are damaged, the required spare parts can be replaced first (and then the purchase order can be made up later).
If the user has higher service demand for the maintenance of SVC equipment, RXPE can also provide customized service packages; specific service items can be selected according to the actual situation, please refer to the list of service contents on the back for details. Multiple service (breakdown maintenance or fault-free maintenance and repair) can be also provided according to the customer’s demand, and the service frequency can be determined according to the user’s demand. After each service ends, the fault diagnosis and treatment report or maintenance and repair report shall be issued. If individual parts are damaged, the required spare parts can be replaced first (and then the purchase order can be made up later).
Free spare parts service of control and protection system is provided on the basis of the second service content “SVC Maintenance and Repair Service Package (annual package)”. If the equipment involved in all the control and protection system is damaged due to non-artificial reasons during the service period, RXPE will replace the spare parts free of charge.
List of maintenance and repair service items
| Item categor | Controller part | Tools required | Man-hours requirement | Test purpose |
|---|---|---|---|---|
| 1.1 | Measurement of power supply and switching power supply | Multimeter | 0.5h-1h | Inspect whether the service voltage of equipment and each unit is stable |
| 1.2 | Detection of PCB board function | Multimeter, oscilloscope, etc | 2h-4h | Check whether the operation status and performance of each PCB board are stable |
| 1.3 | Trip test of controller interlock protection | Multimeter | 2h-3h | Check whether the main body of SVC equipment can output alarm and trip in time when an fault occurs |
| 1.4 | Input and output detection of controller | Multimeter, short connecting piece, screwdriver, etc. | 2h-3h | 1. Check whether the signal displacement of circuit breakers, disconnectors and other equipment in the main circuit of SVC is correct. 2. Whether the input switching value can output alarm and trip in time in case of fault of the body and auxiliary equipment of SVC equipment |
| 1.5 | Inspect and fasten terminal wiring | Multimeter, screwdriver | 1h-2h | Make sure all wiring is secure |
| 1.6 | Monitoring computer and background optimization processing and backup | Mobile hard disk, special optimization software | 1h-2h | Make the running environment of monitoring software be safe and stable, and extend the service life of the monitor |
| 1.7 | Cleaning controller | Vacuum cleaner, alcohol, brush, rust remover, three-proof paint for PCB board, etc. | 2h-3h | Extend the service life of electronic devices |
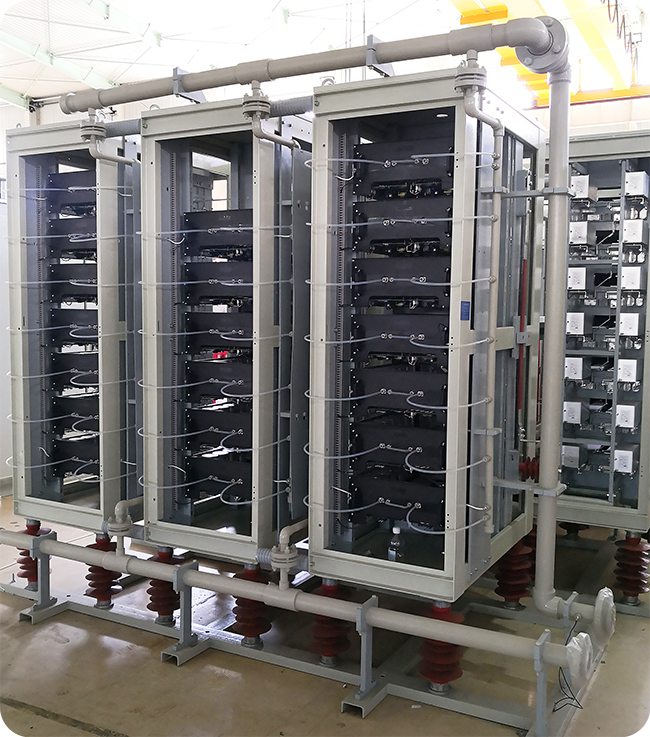
| Item category | Thyristor valve part | Tools required | Man-hours requirement | Test purpose |
|---|---|---|---|---|
| 2.1 | Detection of thyristor resistance | Multimeter | 1h-2h | Check whether the resistance of thyristor meets the standard and observe how much the performance of thyristor decrease |
| 2.2 | Pressure equalizing detection of thyristor valve | Multimeter, professional experimental wire | 1h-2h | Check whether the thyristor and resistance-capacitance absorption circuit are normal |
| 2.3 | Conduction test of thyristor valve | Multimeter, oscilloscope, professional experimental wire | 2h-3h | Check whether the thyristor can be triggered reliably |
| 2.4 | Pulse box waveform detection of electromagnetic triggering thyristor valve | Oscilloscope | 2h-3h | Check whether the pulse circuit works normally |
| 2.5 | Energy-taking test of the TE board of photoelectric thyristor valve | Screw driver, short connecting piece | 2h-3h | Check whether TE board works normally |
| 2.6 | Setting experiment of breakdown detection | Multimeter, professional experimental wire | 1h-2h | Check whether the equipment trips reliably in case thyristor is broken down |
| 2.7 | Resistance value detection of resistance-capacitance absorption part | Multimeter, screwdriver | 1h-2h | Check whether the resistance-capacitance absorption capacitance is normal |
| 2.8 | Capacitance value detection of resistance-capacitance absorption part | Capacitance meter, needle-nose pliers | 1h-2h | Check whether the resistance-capacitance absorption capacitance is normal |
| 2.9 | Fastening of electrical wiring | Adjustable wrench, screwdriver | 1h-2h | Ensure that all wiring is firm to prevent electric discharge and air leakage |
| 2.10 | Bolt fastening | High-pressure air gun, alcohol, rust remover, three-proof paint, etc. | 2h-3h | Make sure that all bolts at connections are tight |
| 2.11 | Cleaning of thyristor valve | Multimeter, screwdriver | 1h-2h | Ensure that the thyristor valve is clean and the components are extended |
| 2.12 | Earthing detection | Earthing resistance tester | 1h-2h | Check whether the earthing point is reliably grounded |
| Item category | Item voltage controller and filter channel | Tools required | Man-hours requirement | Test purpose |
|---|---|---|---|---|
| 3.1 | DC resistance detection of reactor | Insulating ladder of DC resistance tester | 2h-3h | Check whether there is wire break and short circuit between turns in the reactor |
| 3.2 | Inductance detection of reactor | Inductometer, wire, etc. | 1h-2h | Check whether the inductance of reactor meets the standard |
| 3.3 | Resonance point detection of filter channel | Inductometer, capacitance meter, wire, etc. | 3h-4h | Check the performance parameters of capacitor and reactor and judge whether the resonance point deviates |
| 3.4 | Fastening of electrical wiring | Multimeter, screwdriver | 2h-3h | Check whether the equipment wiring is loose, ensure that the wiring is firm, and prevent electric discharge, electric leakage and heating |
| 3.5 | Insulation and withstand voltage test of capacitor and reactance | Equipment for withstand voltage test | 12h-24h | Test the insulation characteristics of capacitance and reactance |
| 3.6 | Fastening of fixing bolts | Adjustable wrench, insulating ladder (it shall be provided by the user in special case) | 2h-3h | Check whether the bolts of the equipment are loose, ensure that the bolts are tight, and prevent electric discharge, electric leakage and heating |
| 3.7 | Record of arrester action | 0.5h | Check the action of arrester to see if there is overvoltage fault | |
| 3.8 | Grounding detection | Ground resistance tester, wire, etc. | 0.5h-1h | Check whether the ground point is reliably grounded |
| 3.9 | Cleaning of primary equipment | High-pressure water gun, alcohol, rust remover, brush, etc. | 3h-4h | Ensure that the primary equipment is clean and free of metal that can lead to electric discharge |
Copyright 2023 rxpe.com | All rights Reseved
辽ICP备2021009432号